
Documentation
Guidance on the usage of REMIT Relax.
Using the Online Editor
The online editor lets you create a new report without an Excel upload, or copy an existing, already processed report to adjust and raise a similar trade—see Copying a Previous Trade below. It's also a great way to get a feel for how a given report format is structured.
Reports created in the online editor can be downloaded as Excel or ACER XML at any time, the same way as uploaded reports.
Create New Report
Starting a New Record
- From the menu, select Generate ACER XML.
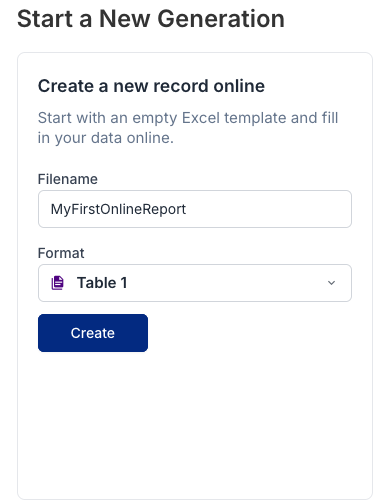
- In the Create a New Record Online section, enter a file name. This will be the name of the generated Excel file, so it must not match an existing file name.
- Choose the target format.
- Click Create to start working in the online editor.
Fill Out the Online Fields
Once a new report is created, the online editor opens. To add data, first add a row using Add First Row. From there, the fields can be filled in much like in the Excel file.
- The numbers in the field references are the same field numbers used in the ACER Transaction Reporting User Manual (TRUM).
- Where the target schema (e.g. REMIT Table 1 or REMIT Table 2) only accepts a predefined list of values, the online editor shows a dropdown with the valid options.
- Hovering over a column's headline always shows the description of that column, so you can see exactly what needs to be filled in.
- Date formats are preformatted, so you don't need to worry about matching the target format.
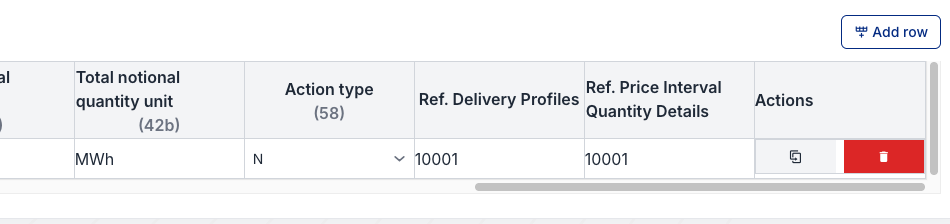
- Each row can be copied or removed using the action buttons at the end of the row.
Referencing Subvalues
The online editor follows the same logic as the Excel templates: one tab per sheet. One tab holds your root records, e.g. Standard Contracts (T1), and a separate tab exists for each type of subvalue that can be attached to them, e.g. Delivery Profiles, Price Interval Quantity Details, or Interval Times.
The target ACER XML format is not flat—a root record can have subsections that occur multiple times per trade (e.g. several Price Interval Quantity Details). Because each subvalue tab is separate from the root record tab, a row you add there needs to be explicitly linked back to its root record (e.g. a Standard Trade) via a shared reference ID. Using a Standard Contract (T1) trade as an example:
- On the root record tab (Standard Contracts (T1)), fill in all the necessary data. At the end of the row are reference fields for each subsection, e.g. “Ref. Delivery Profiles” and “Ref. Price Interval Quantity Details”. Choose a unique ID to use as the reference, e.g.
1or the trade ID.
- Switch to the tab of the subsection, e.g. Delivery Profiles, and add a new row.
- In the first column, select the unique ID you chose in step 1. In some cases, the associated Contract ID is also shown, helping you identify the correct root record.

The linkage is now complete.
Validation and Errors
The online editor already validates your values before generating the report. Whenever you click Save, or after several other actions along the way, the entered values are validated.
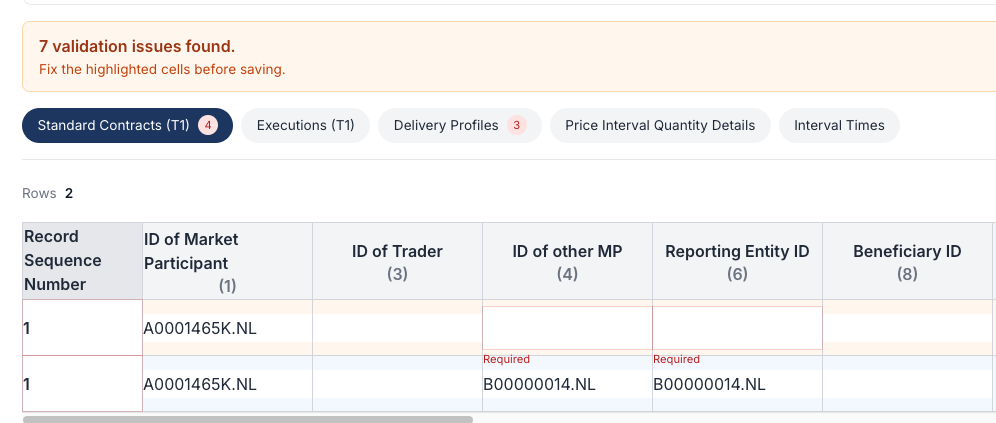
- A notification tells you how many validation issues were found.
- Each tab shows a red number indicating how many validation errors occur in that section.
- The affected record is highlighted in yellow, and the affected fields get a red border, often with a hint explaining what went wrong.
- You can only continue once these fields have been corrected.
Copying a Previous Trade
The online editor isn't only for starting a brand-new report—it can also create a new report from one you've already processed. This is helpful when a contract has similar trades with only slightly changed values: instead of starting from scratch, you can recreate a previously processed trade and simply adjust the values.
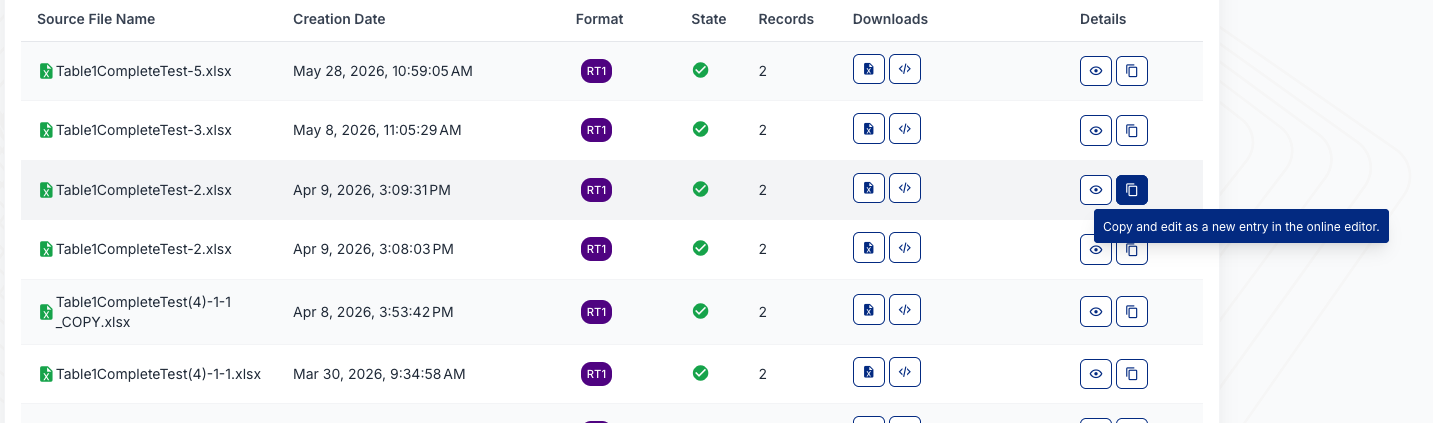
- In the History section, search for the trade you want to duplicate.
- In that trade's row, additional action buttons appear at the end of the row. Click the icon that looks like a copy symbol.
- The trade opens in the online editor, where you can edit the values as needed and reprocess it as a new document. You can also adjust the file name within the online editor.
Generating Reports
Whether a report was started from scratch in the online editor or copied from a previous trade, the final step is the same: click Save & Continue to process the trade. From here, the process is the same as with an Excel file upload.
- The next step shows an overview, which has already converted the entered values into an Excel file. The record is now visible on the History screen and can also be processed at a later time.
- You can again choose whether a UTI should be written back into the sheet.
- Click Process to finally process the values, provided no errors occur.
- From here you can download the ACER XML file, the Excel file, or the combination of all files as a ZIP.